Easy Guide to Installing Canon MX340 Drivers on Windows 11/8/7 Platforms
Mastering the Arduino Nano Driver Installation Process for Windows Users: No More Headaches
If you’re using Arduino products to create your own work but failed to connect with your Windows computer, then you’ve come to the right place. It’s maybe caused by driver issues. This post is going to tell you how to fix it.
Disclaimer: This post includes affiliate links
If you click on a link and make a purchase, I may receive a commission at no extra cost to you.
Why you need the driver?
As we know, Arduino is an open-source electronics platform let users design and create their own work. But when you need to connect it with a Windows computer, you’ll need a correct and appropriate driver.
It is because drivers are software components that make devices and the operating system talk to each other. Both system and device are updating to catch up with the changing world, so is drivers. If the operating system changes the way it speaks to devices and drivers haven’t updated, devices can’t receive correct commands and cause problems.
That’s why most of the problems can be solved by installing/updating drivers.
How to download Arduino Nano driver?
There are two ways you can update your Arduino Nano drivers.
Option 1 – Manually – You’ll need some computer skills and patience to update your drivers this way, because you need to find exactly the right driver online, download it and install it step by step.
OR
Option 2 – Automatically (Recommended) – This is the quickest and easiest option. It’s all done with just a couple of mouse clicks – easy even if you’re a computer newbie.
Option 1 – Download and install the driver manually
The screenshots below are from Windows 10, but the steps are also valid for other Windows system.
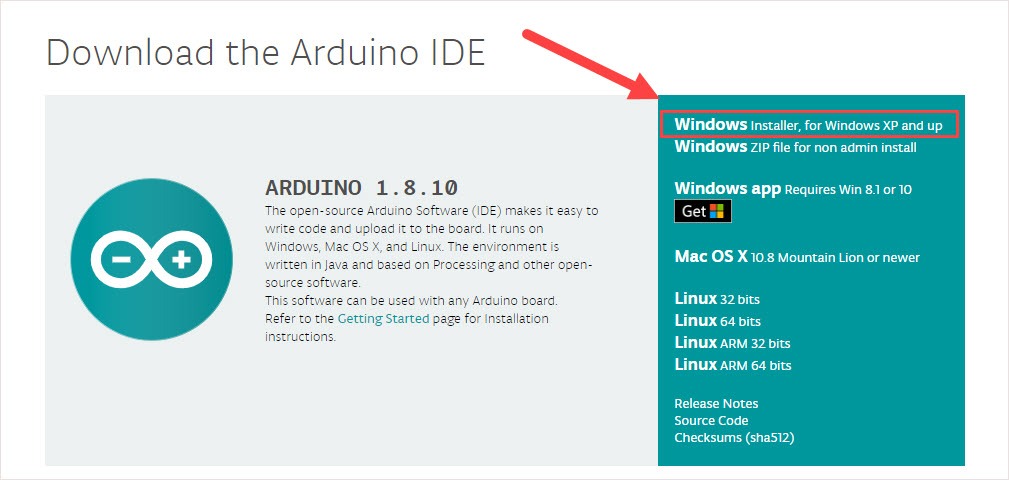
- Go to the Arduino official download website .
- Click Windows Installer, for Windows XP and up .

- ClickJust Download . The driver .exe installation file would then be downloaded automatically.

4. On your keyboard, hold down the Windows logo key + Pause . Then click Device Manager .
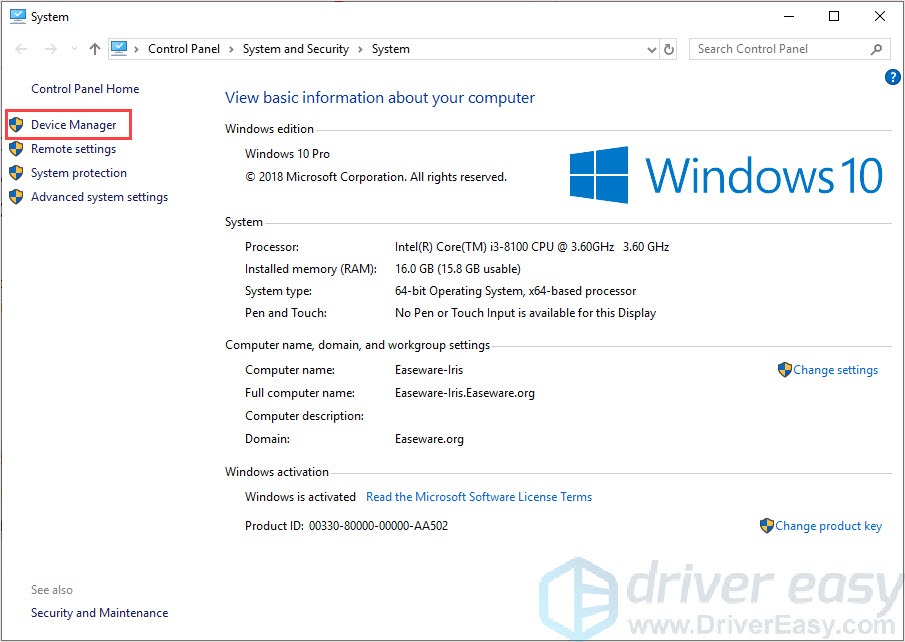
5. Find and right-click your Arduino Uno software . Probably it’s listed under the Other devices section due to the problem. Then select Update driver .
Select Browse my computer for driver software .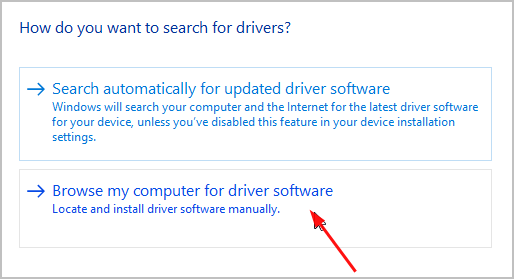
6. Click the Browse… icon. Another window appears: go to the folder with the Arduino nano driver that you just downloaded. Select the drivers folder, then OK > Next .
If you don’t have the time, patience or computer skills to update your Arduino Uno driver manually, you can do it automatically with Driver Easy . Move onto Option 2 then.
Option 2 – Automatically update drivers
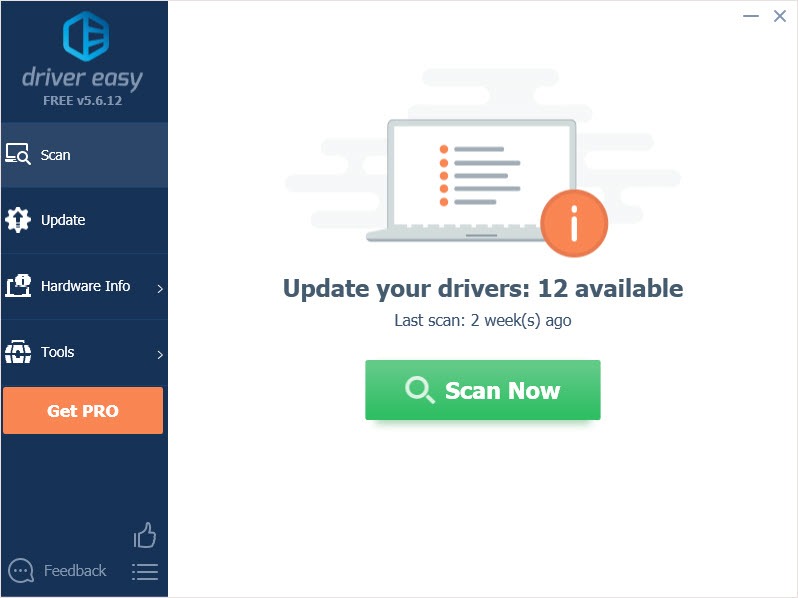
If you don’t have the time, patience or skills to update the driver manually, you can do it automatically with Driver Easy .
Driver Easy will automatically recognize your system and find the correct drivers for it. You don’t need to know exactly what system your computer is running, you don’t need to be troubled by the wrong driver you would be downloading, and you don’t need to worry about making a mistake when installing.
You can update your drivers automatically with either the FREE or the Pro version of Driver Easy. But with the Pro version it takes just 2 steps (and you get full support and a 30-day money back guarantee):
- Download and install Driver Easy.
- Run Driver Easy, then click Scan Now . Driver Easy will then scan your computer and detect any problem drivers.
- Click the Update button next to the flagged driver to automatically download the correct version of that driver, then you can manually install it (you can do this with the FREE version).
Or click Update All to automatically download and install the correct version of all the drivers that are missing or out of date on your system (this requires the Pro version – you’ll be prompted to upgrade when you click Update All).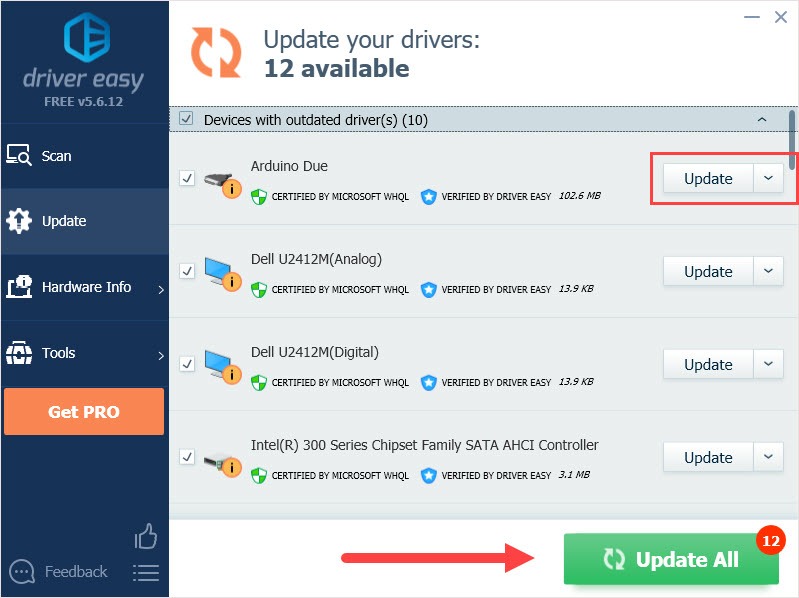
Note : If you have any problems while using Driver Easy, feel free to contact our support team at [email protected] . Be sure to attach the URL of this article if needed for more expedient and efficient guidance.
Hope this article will meet your need. If you have any question, please leave comments below, we’ll try our best to help.
Also read:
- [New] One-Stop Guide for Mastering SRT Conversions and Formats
- [Updated] In 2024, IPhone Cinematography Guide 8 Insider Secrets to Professional Video Creation
- Easy How-To: Get the HP LaserJet Pro M402n Printer Drivers for WINDOWS Set Up
- Ensure Peak Performance - Download the Updated Canon PIXMA TS3322 Printer Software
- Expert Insights on the OnePlus 6T: Impressive Performance Meets Affordability
- Get Enhanced Performance: [Free] Windows 11 Drivers for Intel Iris XE Graphics Now Available
- In 2024, Replace Missing Watch Playback Icons
- Include Stage Directions Such as Lighting Changes and Dancer Interactions to Enhance the Performance;
- Install or Upgrade Lenovo Screen Control Software – Easy Steps Inside
- Laptop The Ultimate Guide to Free Movie Decoders for 2024
- Masterclass in Creating Dynamic Facebook Slideshows
- Obtain Your Gigabyte Audio Drivers Now - Complimentary!
- Solution: Shielded Metal Arc Welding (SMAW) and Gas Tungsten Arc Welding (GTAW) Are the Types of Welding Processes Most Affected by Arc Blow
- The Ultimate Reference to Gesture and Movement Capture
- Uncovering the Shadows of Window 11'S Interface
- Updated 2024 Approved Free 3GP Video Rotator Review Top-Rated Options
- Title: Easy Guide to Installing Canon MX340 Drivers on Windows 11/8/7 Platforms
- Author: Charles
- Created at : 2025-02-26 11:11:08
- Updated at : 2025-03-04 05:38:37
- Link: https://win-amazing.techidaily.com/easy-guide-to-installing-canon-mx340-drivers-on-windows-1187-platforms/
- License: This work is licensed under CC BY-NC-SA 4.0.