
Easy Tutorial: Adding and Displaying a Microsoft Excel File Directly on Your Blog

Easy Tutorial: Adding and Displaying a Microsoft Excel File Directly on Your Blog
Quick Links
- Method 1: Get the Embed Code From OneDrive
- Method 2: Get the Embed Code From Excel on the Web
- Customize the Code
While you can easily share an Excel workbook or spreadsheet, you might want to make it available to a larger audience. If you have a blog or website, you can embed the file by copying and pasting the embed code.
You can grab the code to embed the spreadsheet from either OneDrive or Excel on the web. Then, customize the appearance and ways your visitors can interact with the workbook or sheet.
Method 1: Get the Embed Code From OneDrive
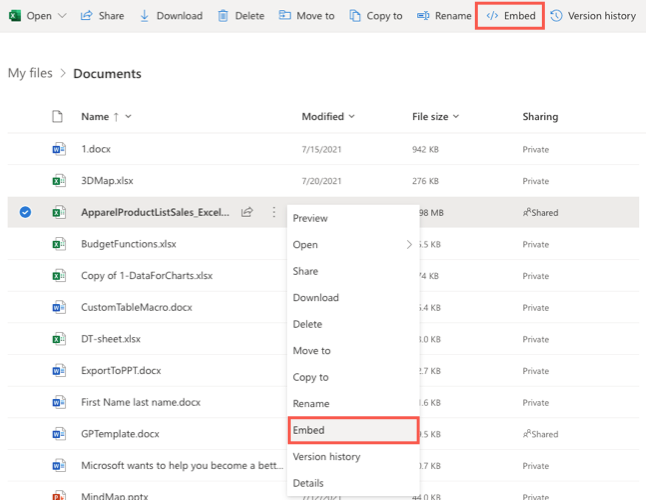
Visit OneDrive on the web and sign in. Locate the Excel file you want to use and select it. When the toolbar appears at the top, click “Embed.”
If you’re using List or Compact List view, you can also click the three dots next to the file and select “Embed.”
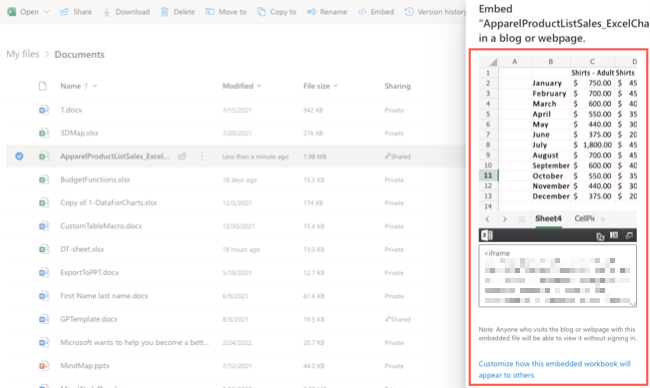
A sidebar will open with a preview of the sheet and the embed code. You can copy the code as-is or make changes to it so that it fits your needs. Select the link at the bottom of the sidebar if you’d like to customize the code.
Method 2: Get the Embed Code From Excel on the Web
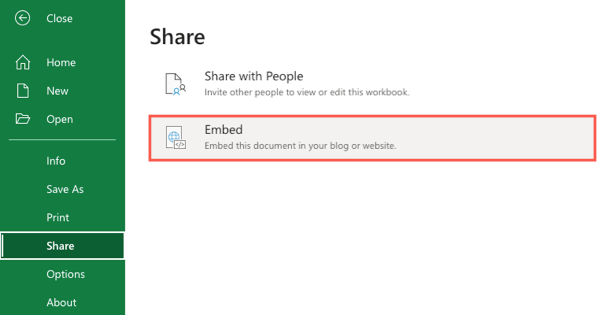
Visit Excel on the web and sign in. Locate the file you want to use and open it. Head to the File tab and select Share > Embed.
You can then make the adjustments described below to customize the code.
Customize the Code
Regardless of which method you use above, you’ll see the same options for customizing the code. These options appear on the left side of the screen with a preview on the right so that you can see how your changes affect the sheet.
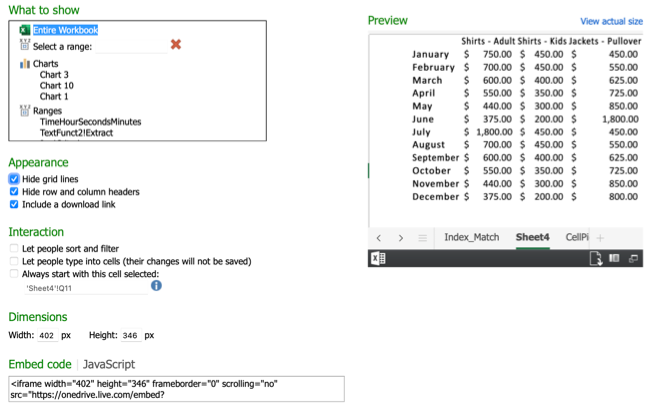
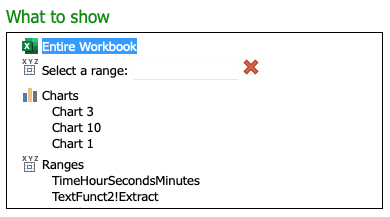
What to Show: You can choose the entire workbook, a specific range, a chart, table, or other option that you see.
Appearance: Check the boxes for hiding the grid lines or headers, and optionally to include a download link.

Interaction: Check the boxes to let others sort and filter or enter data in the cells. Note that if you allow the second option, changes they make are not saved. You can also enter a specific cell to start with or click a cell in the Preview to set the active cell.

Dimensions: If you want the spreadsheet to be a certain size, enter the width and height in pixels.

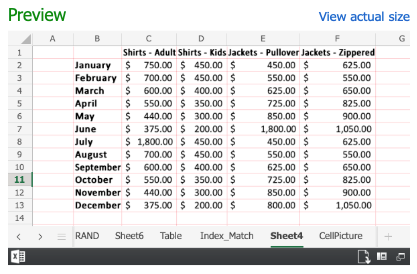
Preview: As mentioned, you’ll see any changes you apply on the left side to the preview on the right side. If you’re sharing the whole workbook, you can move through each sheet using the tabs.
If you adjusted the dimensions for the workbook, you can use the View Actual Size link to open the size that will display in a new browser tab.
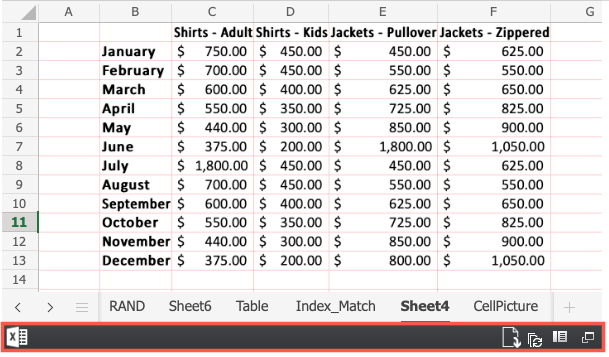
You’ll also see a small toolbar across the bottom in both the Preview and View Actual Size. This contains buttons for opening Excel on the web, downloading the file if you marked that option, refreshing the connections, obtaining information about the workbook, and opening the file in full-size.
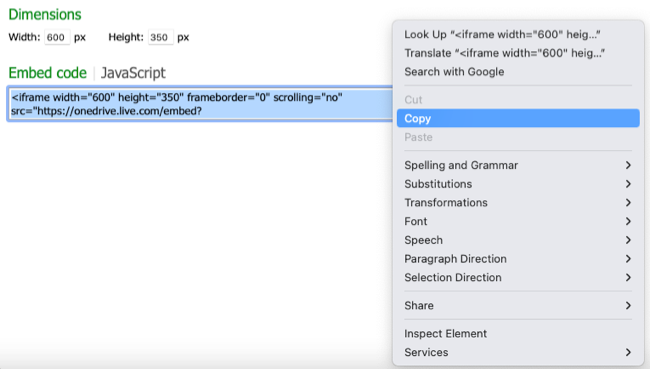
Embed Code or JavaScript: On the bottom left is a box containing the code that you’ll copy after making your adjustments and reviewing the preview. You can choose Embed Code or JavaScript per your preference.

Place your cursor inside the box to select all of the code. Then either right-click and pick “Copy” or use the keyboard shortcut Ctrl+C on Windows or Command+C on Mac.
You then have the code on your clipboard that you can paste into your blog or website where needed.
By sharing the Excel workbook, sheet, table, or chart on your site, your visitors can see a nice snapshot of the data you want to share.
For more, look at how to embed Google Calendar on your site too!
Also read:
- [Free Download] ASRock AB350 Pro4 Drivers in Windows. Easily
- [Updated] From Good to Great Transformative Tactics with Studio
- [Updated] Gopro Tips and Tricks
- A Working Guide For Pachirisu Pokemon Go Map On Realme GT 5 Pro | Dr.fone
- Easy Instructions on Upgrading the Software of Your Intel Centrino Advanced-N 6230 Network Adapter Drivers
- How to Bypass iCloud Lock from iPhone 13
- In 2024, 3 Things You Must Know about Fake Snapchat Location On Nubia Red Magic 8S Pro+ | Dr.fone
- Intel USB 3.0 Driver Update Pack - Compatible with Windows N - Easy to Download and Install
- Quick Guide to Lenovo X1 Carbon Driver Installation for Windows 11 & 7 Systems
- Title: Easy Tutorial: Adding and Displaying a Microsoft Excel File Directly on Your Blog
- Author: Charles
- Created at : 2024-11-30 11:19:22
- Updated at : 2024-12-05 20:55:01
- Link: https://win-amazing.techidaily.com/easy-tutorial-adding-and-displaying-a-microsoft-excel-file-directly-on-your-blog/
- License: This work is licensed under CC BY-NC-SA 4.0.