
Mastering Data Organization: Tips for Shifting Columns & Rows Efficiently in Excel
Mastering Data Organization: Tips for Shifting Columns & Rows Efficiently in Excel
Quick Links
If you’re looking to move a column or a row to a different location in your spreadsheet, you have multiple options to do that in Microsoft Excel. We’ll show you what those options are.
To use any of the below methods, first, open your spreadsheet with Microsoft Excel on your Windows or Mac computer.
How to Move a Column in Excel
To move a column in an Excel spreadsheet, use either drag and drop or the cut and paste method.
Related: How Do You Emulate Drag and Drop Without Holding the Mouse Button Down?
Move a Column With Drag and Drop
With Excel’s drag and drop method, you can move your columns around just by dragging and dropping them.
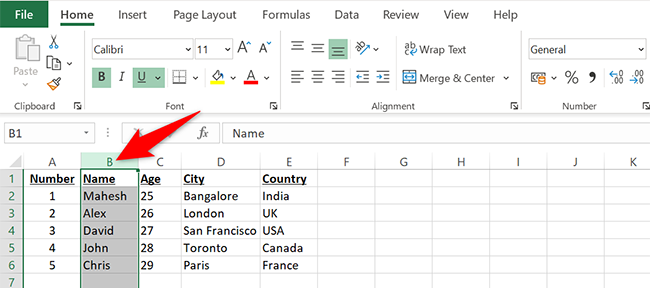
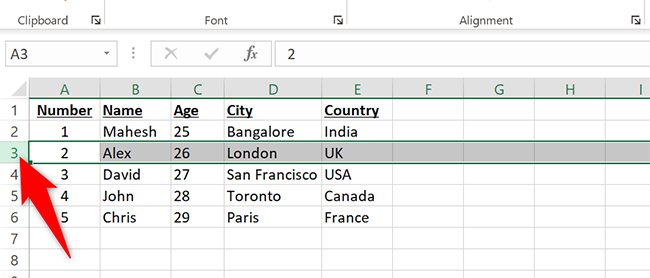
To use this method, first, find the column you want to move in your spreadsheet. At the top of this column, click the column letter so the entire column is selected.
Use your mouse or trackpad to bring the cursor to the border of the column. This turns your cursor into a four-arrow icon.
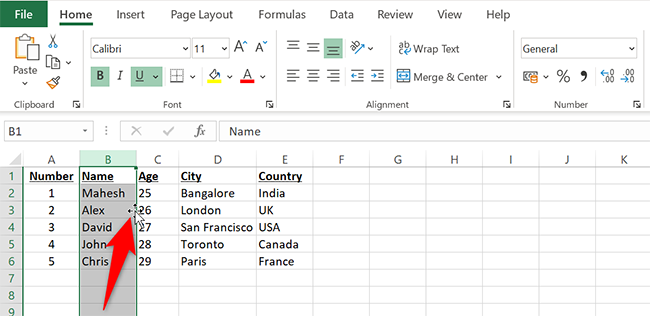
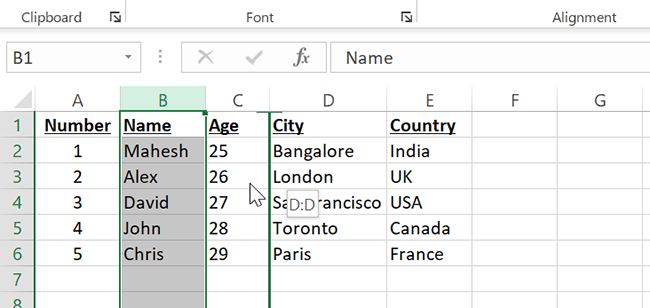
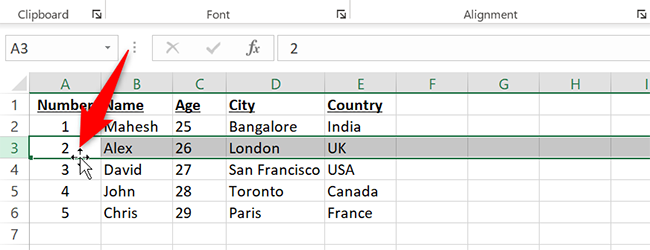
While your cursor is a four-arrow icon, press and hold the Shift key on your keyboard. Then drag the column to its new location in your spreadsheet. Excel will place your column to the left of the column where you drop it.
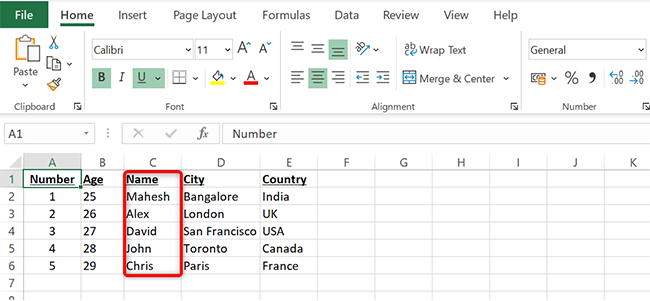
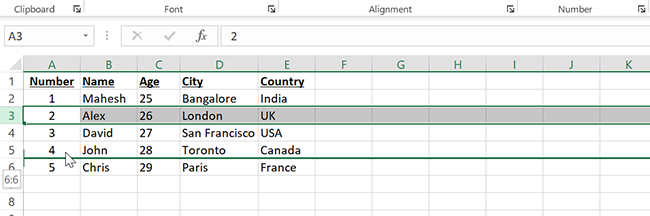
And that’ it. Your selected column is now available at its new location.
Move a Column With Cut and Paste
Another way to move a column in your spreadsheet is by cutting and pasting the column.
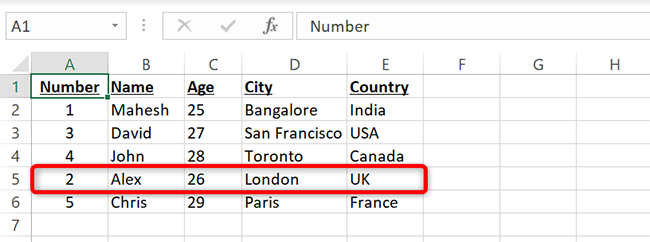
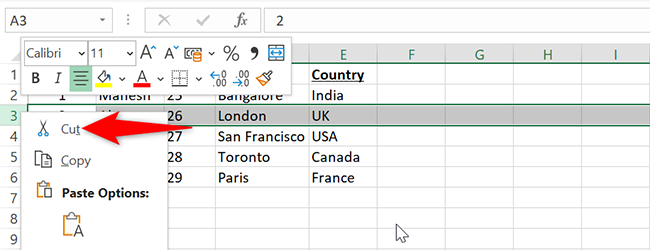
To use this method, find the column you want to move in your spreadsheet. Right-click the letter at the top of this column and select “Cut” from the menu.
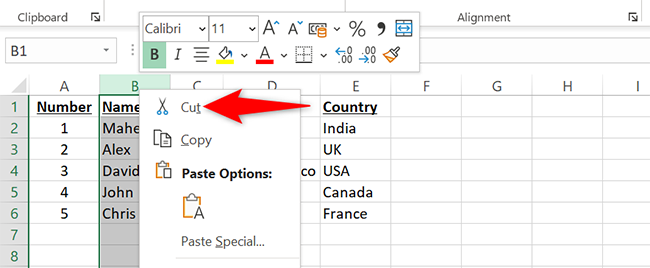
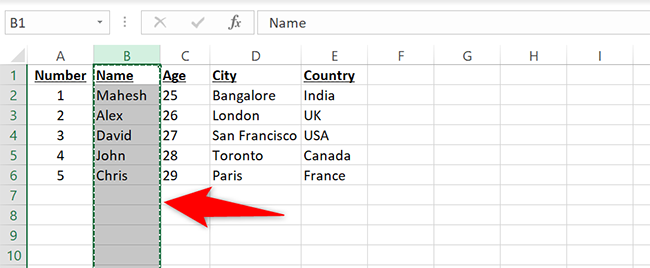
You’ll see an animated dotted line around your selected column. This confirms your column is successfully cut.
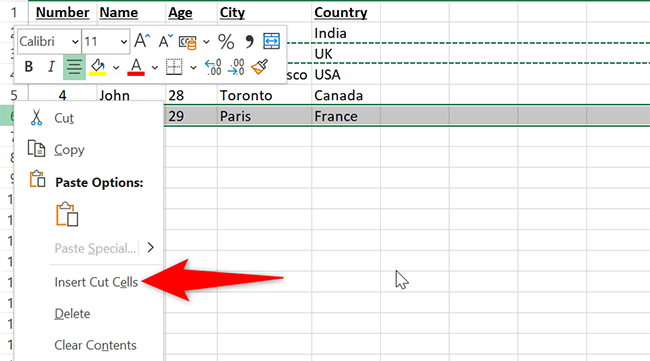
Find the column where you want to place your selected column. Excel will place your cut column to the left of this new column. Right-click the letter of this new column and select “Insert Cut Cells” from the menu.
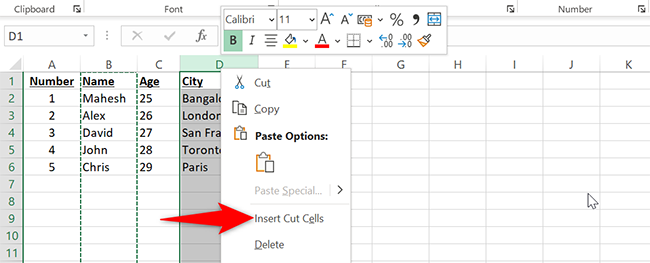
Your original column will appear to the left of the selected column.
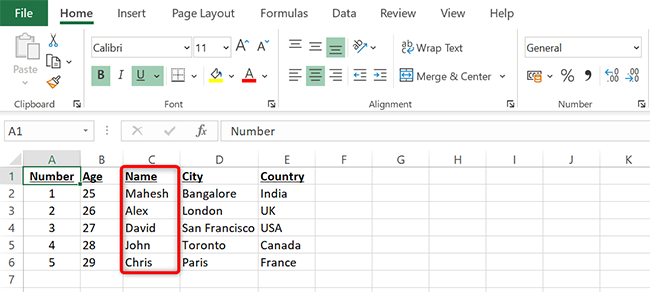
And that’s how you move around your columns in your Excel spreadsheets!
If you have data in one column that you want to be split into multiple columns , fixing that is easy!
Related: How to Make One Long Column into Multiple Columns in Excel
How to Move a Row in Excel
Like with columns, you have a couple of ways to move rows in your spreadsheets. Use either drag and drop or cut and paste to move around your selected rows.
Move a Row With Drag and Drop
To quickly move a row to a new location, use this drag and drop method.
First, find the row to move in your spreadsheet. Then click that row’s number to the extreme left of your spreadsheet.
Hover your cursor over the selected row’s borders, and your cursor will turn into a four-arrow icon.
While your cursor is still a four-arrow icon, press and hold the Shift key on your keyboard. Then drag the row to its new location.
Your row is now placed at its new location.
Move a Row With Cut and Paste
If you don’t prefer drag and drop, use the cut and paste method to move your rows.
First, in your spreadsheet, find the row to move. Then right-click this row’s number and select “Cut” from the menu.
Now find the row above which you want to place your cut row. Right-click this new row’s number and select “Insert Cut Cells” from the menu.
Your row is now at its new location.
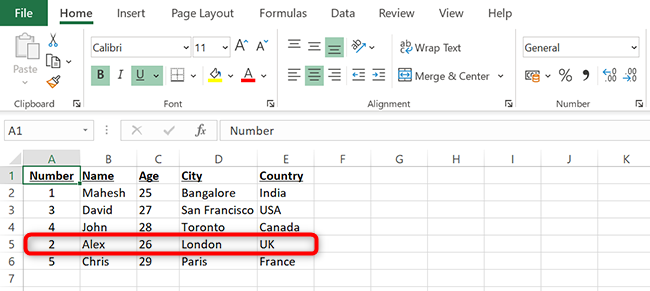
And you’re all set.
There are times when you want to move your data around in your spreadsheets. With Excel’s quick and easy move options, you can quickly rearrange data in your various spreadsheets. Very useful!
And, if you ever need to turn a row into a column , Excel makes it equally easy to do that.
Related: How to Convert a Row to a Column in Excel the Easy Way
Also read:
- [Updated] 2024 Approved From Simple Scenes Advanced Techniques for Snapchat Edits
- Free Download: Ultimate Guide to Installing Logitech G PRO Drivers on Windows 11, 10, 8 & 7
- How to recover old videos from your Poco X5
- How to Transfer Data from Realme GT Neo 5 SE to BlackBerry | Dr.fone
- HP Envy 5055 Easy Driver Update Process - Speedy Download Links
- In 2024, 8 Ways to Transfer Photos from Samsung Galaxy M34 5G to iPhone Easily | Dr.fone
- Install Epson Artisan 1430 Drivers on Your PC: Windows 11/10/8 Compatible Version
- Open Source Tranquil Harmony for 2024
- Overcoming Connectivity Obstacles: Resolving ASUS PCE-AC56 Driver Errors for Windows 11/8/7
- Pioneering Online Presence with Cutting-Edge 360 Videos for Facebook for 2024
- Sounds of Silence: Mute Non-Interactive Apps
- Title: Mastering Data Organization: Tips for Shifting Columns & Rows Efficiently in Excel
- Author: Charles
- Created at : 2024-12-03 21:58:32
- Updated at : 2024-12-06 10:20:13
- Link: https://win-amazing.techidaily.com/mastering-data-organization-tips-for-shifting-columns-and-rows-efficiently-in-excel/
- License: This work is licensed under CC BY-NC-SA 4.0.